Thursday, June 21, 2012

Countertops!!!

Countertops were installed today!


and the sink!


no running water yet (the plumber will stop by tomorrow)

the faucet and sink are by Vigo and I purchased them at FaucetDirect.com


see that little chrome button?  that is the garbage disposal switch... rather than use a standard wall switch, we opted for the countertop plunger switch.  one press turns on the disposal, one more shuts it off.  We got this one at Lowes, but its probably available at Home Depot too.


progress was made on the pool today...the underground plumbing pipes were installed and pressure tested!

the new skimmer was installed too!


and the plaster is still being chiselled off...soon to be re-plastered!


checking out the deep end...pretty good!


Tuesday, June 19, 2012

what stinks?

Oh that's just the smell of years of neglect!


The pool contractor started work today...drained the pool, removed the concrete deck and coping, and started to chip away the plaster.  disgusting!

It was the first time that we were able to see how deep the pool actually is.

The bottom of the pool was lined with a thick layer of leaves.


Sunday, June 10, 2012

Nnnnnnougat!

For the countertops, we have selected...
Ceasarstone Quartz- in Nougat


I didnt think it was going to be easy to find a countertop that would work with the floor tile:

The stained oak cabinets:

the dove white cabinets:

AND, more importantly, that Scott and I BOTH liked.

But we found it!  

 So, the countertop peeps will measure and template the cabinets on Wednesday--it wont be long before we have the new countertops in place!

Friday, June 8, 2012

cabinet install...very exciting!

but really bad photos!
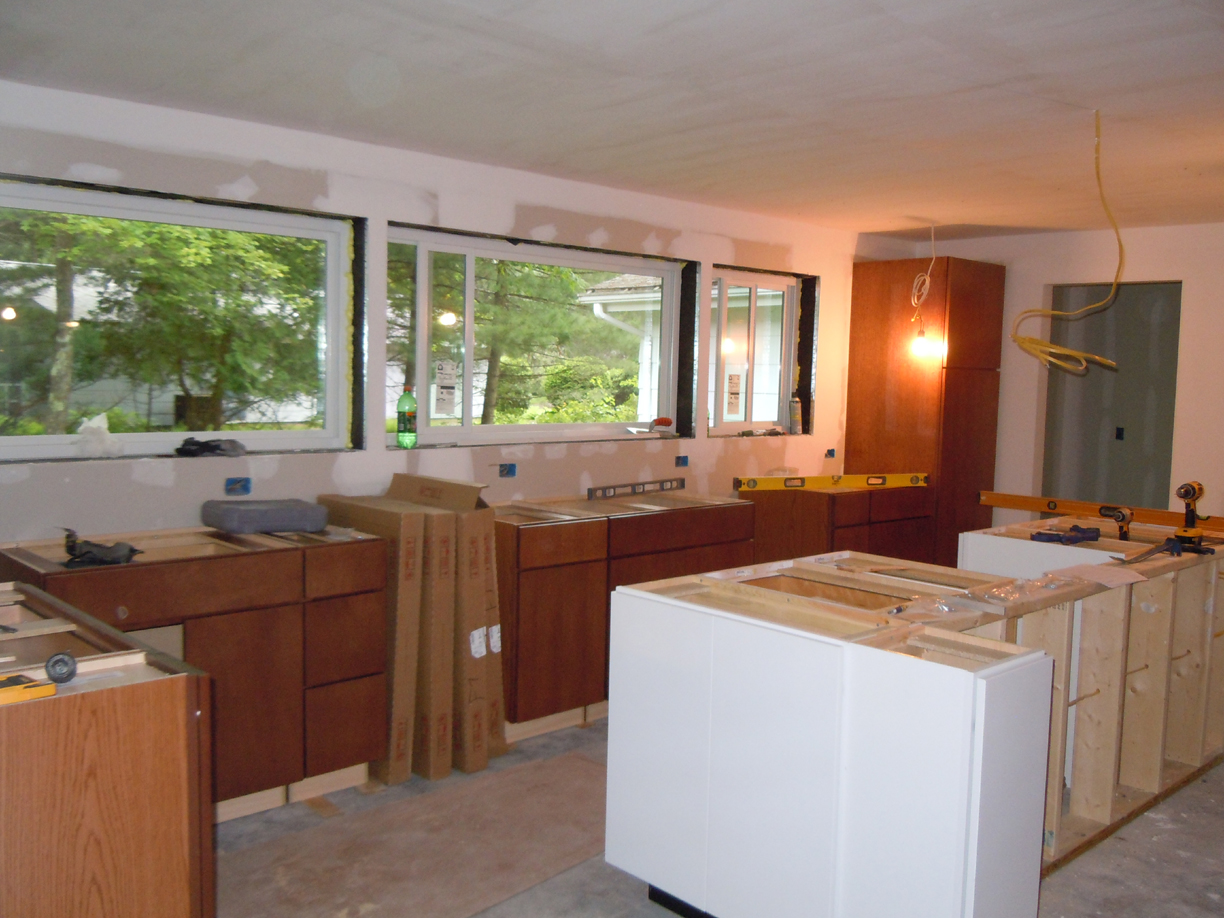
The cabinets that line the outer wall are by Schuler.  The door style is Soho and they are Quartersawn Oak with an Amaretto stain.  We ordered them through Lowe's

The ceiling used to have a nubby sandy texture to it...but the plasterer has skim coated it with fresh plaster- it still needs to be sanded, but we are very happy with the results so far!

The island cabinets are Kraftmaid- just a simple flat slab door panel in Dove White.  also from Lowe's.


A tour of the island:
here is the island...the range will be in the middle. 

with two pull out pantry drawers on either side (for spices and oils- very convenient!)

At each end of the island there are 12" deep cabinets.  I keep calling this one my tuperware cabinet...and boy am i excited about it!  We ordered 4 extra full height door panels to cover the exposed sides of the cabinets that are at the corners...the intention is to camoflage the side of the cabinet as a door

and on the side of the island that faces the dining room, there are two 12" wide x 12" deep cabinets that will hold items for the dining room (napkin rings, candles, vases, linens, etc).  There will be space for 4 stools between these cabinets.  In this photo, you can see the low wall and conduit that I mentioned in the previous post.

Just another view...from the Living Room pass thru...I recently ordered stainless steel sliding barn door hardware for the opening to the Pantry.

Drawers for Pots/Pans and lids...and a tall thin cabinet for cookie sheets.

A tall cabinet for glasses & dishes

One gap in the cabinet is for the dishwasher, the other is for the under counter freezer (since the fridge we ordered doesnt have a freezer...its just a full height refrigerator)

That's it for now...I promise to take better photos soon!  Now we have to select a countertop- Im thinking Quartz...we'll see!

a boring post about concrete and electrical conduit

Because we located the range in the island, we needed to somehow get electricity to it


so, we had to cut the concrete slab and chisel out a trench that would hold two conduit...one for the range and the other for a couple of electrical receptacles.

the trench runs from the side wall of the kitchen, to what will be a low wall that will be located behind the range and below the kitchen island countertop (this photo is deceptive...it is a very messy, very dirty process!)

here is a view of the installed conduit....we then needed to pour some fresh concrete and embed the conduit.

it's fresh concrete...i couldnt resist!  even though it will be hidden beneath the new tile!


and finally, the low island wall with conduit poking up from the slab...
easy peasy (not really) and yes, a little bit boring!

Sunday, June 3, 2012

The four most expensive words in construction = while-you're-at-it!

The plasterer will begin tomorrow (monday), so we spent the weekend hanging drywall (yay for us!)
a view of the kitchen... 
the plasterer is also going to plaster over the textured ceiling in the living room, dining room, pantry and hall.

the real windows...and the "window" to the living room!

a view towards the pantry- and the hall niche where we will install built-in shelving


the new Pella door & window that we installed in the pantry


another view of the hall- the shelves will be on the left there between those wing-like walls.


and we decided to tear out the wood panelling in the living room and install new drywall "while we're at it"!!!  but the old fake beams will have to stay for now- hopefully they will look better when painted!
Related Posts Plugin for WordPress, Blogger...